


Jodadaty | جذاذتي

Create organized lesson plans by language, subject, and grade level, and edit them using rich formatting tools.

App Screenshots

About This App

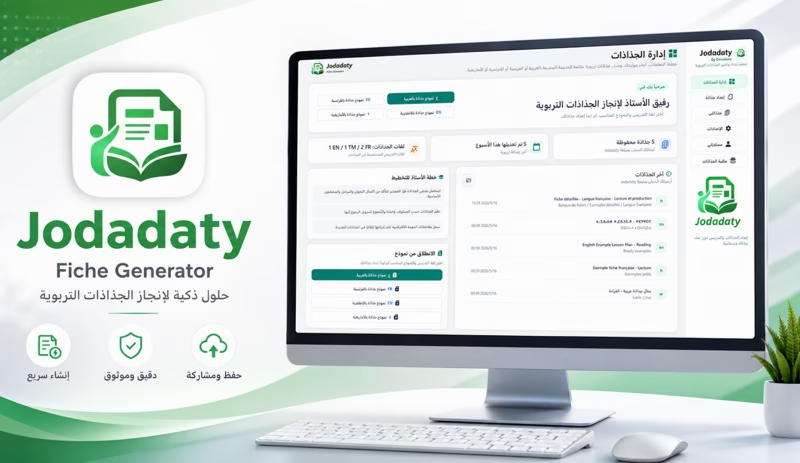
Jodadaty By Devallone is a desktop application designed for teachers to create educational lesson plans quickly and in an organized way. The application allows users to create lesson plans in Arabic, French, English, or Amazigh by selecting the grade level, subject, component, domain, unit, week, session number, and duration, then editing the lesson content through a clear interface designed for everyday teaching work.

The application includes a complete editor for writing and formatting the different elements of a lesson plan, including competencies, objectives, prior learning, teaching materials, lesson procedures, notes, and guidelines. It also supports organizing lesson stages into separate cards containing teacher activities, learner activities, work format, and the duration of each stage, making lesson preparation clearer and more structured.

Jodadaty allows lesson plans to be saved in its dedicated .jodadaty format so they can be reopened and edited later. Lesson plans can also be exported as print-ready PDF files. The application provides several PDF customization options, including layout style, logo, fonts, information header, footer, signature images, and institution stamp.

Through the “My Information” page, users can enter their professional information once, including the institution name, academy, directorate, school year, teacher name, principal, and inspector, as well as the logo, signatures, and institution stamp. This information can then be automatically reused in new or previously saved lesson plans.

The application also includes a “My Lesson Plans” page for organizing saved lesson plans using a tree of categories and folders. Users can search, open, copy, delete, locate files on their computer, and add categories to favorites. Jodadaty can also automatically generate a category structure aligned with the Moroccan curriculum according to grade level and subject.

Jodadaty also provides a lesson plan library connected to the Devallone server, allowing teachers to download ready-made lesson plans and templates, save them locally, open them directly, or add them to favorites. The application also includes a book request feature for teachers who need lesson plans for a textbook that is not yet available in the library.

The application is designed with privacy in mind. Lesson plans and settings are stored locally on the user’s device, and files are not automatically uploaded to any server. An internet connection is used only when accessing the lesson plan library, submitting book requests, verifying the Microsoft Store license, or opening official links.

In short, Jodadaty is a digital companion for teachers that helps them create, organize, save, and export lesson plans for printing while reducing repetitive work and providing a practical experience designed specifically for educational use.

App Details

Platform

Wondows

Availability

Microsoft Store

Updates

Supported

Use Case

Productivity

Ready to Try This Windows App?

Install the app from Microsoft Store and start using it today.

Devallone Guide

Tutorial

Clean step-by-step guidance with a smoother reading experience.

Jodadaty User Guide

A complete guide to creating, organizing, saving, and exporting educational lesson plans to PDF using Jodadaty By Devallone.

Official Page
Jodadaty Mobile

What is Jodadaty?

Jodadaty is a desktop application designed for teachers. It helps create organized educational lesson plans in Arabic, French, English, or Amazigh. Your work can be saved in the dedicated .jodadaty format and later exported to PDF.

The application follows a simple workflow: choose the lesson-plan language, grade level, subject, component, unit, week, and session, then edit the content using an organized editor and export the final result for printing.

What Can You Do With the Application?

  • Create educational lesson plans in multiple languages.
  • Organize grade level, subject, unit, week, and session information.
  • Edit objectives, competencies, teaching resources, and lesson stages using a rich-text editor.
  • Save lesson plans and reopen them later using Jodadaty’s dedicated file format.
  • Export lesson plans as print-ready PDF files.
  • Organize files in the My Lesson Plans page using categories and folders.
  • Enter your professional information once and automatically reuse it in lesson plans.
  • Download ready-made lesson plans from the library or request a textbook that is not yet available.

First Launch

When you open the application for the first time, a privacy policy window may appear. Read it and click the agreement button to continue.

Important: Your lesson plans and settings are stored locally on your device.

The application does not automatically upload your lesson plans to any server.

An internet connection is used when accessing the lesson-plan library, requesting a book, verifying a Microsoft Store license, or opening Devallone and Google Play links.

Main Interface

The application’s sidebar contains the following main pages:

Lesson Plan Management

The main dashboard with statistics, quick lesson-plan creation buttons, and your most recently used lesson plans.

Prepare a Lesson Plan

Create a new lesson plan or edit an open one while choosing the language, grade level, subject, and other session information.

My Lesson Plans

Organize lesson plans within a category tree, search for them, open them, copy them, or delete them.

My Information

Enter information about your institution, teacher, principal, and inspector, along with logo, signature, and stamp images.

Settings

Configure the application language, default lesson-plan language, categories, curriculum, and PDF options.

Lesson Plan Library

Download ready-made lesson plans and templates, use favorites, and request books that are not yet available in the library.

Dashboard: Lesson Plan Management

This page is the main starting point for daily work. It provides buttons for creating lesson plans in Arabic, French, English, or Amazigh, along with the number of saved lesson plans, lesson plans modified during the week, and a summary of the languages used.

  1. Choose the template language using the quick-start buttons.
  2. The application will open the lesson plan directly in the editor.
  3. Edit its name, date, and content as needed.
  4. Save the file using the Save button.

Create a New Organized Lesson Plan

  1. Open the Prepare a Lesson Plan page.
  2. Click Create New Lesson Plan if no lesson plan is currently open.
  3. Enter the lesson-plan name.
  4. Choose the lesson-plan language.
  5. Choose the grade level and subject.
  6. Choose the component or domain, followed by the topic or entry according to the subject.
  7. Specify the unit, week, session number, and duration.
  8. Choose the appropriate category from the category tree.
  9. Click Create.
Note: The application’s interface language does not determine the direction of the lesson plan. The editing direction is based on the lesson-plan language itself: Arabic uses right-to-left, while French and English use left-to-right.

Editing a Lesson Plan

After opening a lesson plan, the top section displays file information and the main action buttons: Open, Save, Save As, Fill from My Information, Export PDF, Open Last PDF, Validate Lesson Plan, and Close Lesson Plan.

Text Formatting Toolbar

You can use undo and redo, bold, italic, underline, bulleted and numbered lists, text alignment, colors, mathematical and geometric symbols, and superscript numbers.

Lesson Plan Fields

The application displays fields according to the selected lesson-plan template, including grade level, subject, component, domain, unit, week, session, school year, duration, competencies, objectives, resources, lesson procedure, notes, and guidelines.

Lesson Stages

Lesson stages are displayed as separate cards. Each card can contain the stage name, teacher activities, learner activities, work format, and duration in minutes. You can add a stage, move it up or down, or delete it.

Saving and Opening Files

The application’s primary project format is .jodadaty.

  • When saving a new lesson plan, the application asks you to choose a save location.
  • After saving, the lesson plan appears in Recent Lesson Plans and on the My Lesson Plans page.
  • New files are stored internally using a compressed and protected format.
  • Older JSON files or older .jodadaty files can still be opened. After they are saved again, they are converted to the new format.
  • Use Save As when you want to create a new copy of the same lesson plan.

Export a Lesson Plan to PDF

  1. Open the lesson plan in the editor.
  2. Make sure your latest changes are saved.
  3. Click Export PDF.
  4. Choose where to save the PDF file.
  5. If the option to open the PDF after export is enabled, the file will open automatically.
Notice: If the watermark-removal feature is not activated, exported PDFs may contain a watermark. Watermark removal is available as a one-time purchase through the Microsoft Store and is not a monthly subscription.

From the Settings page, you can configure the PDF style, logo, fonts, header, signature images, footer, and whether the file should automatically open after export.

My Lesson Plans

The My Lesson Plans page is designed for organizing and searching your files. Depending on the layout, the category tree appears on one side and your saved lesson plans appear on the other.

Section Available Actions
Category Tree Add a folder, add a subfolder, add a category, rename, delete, copy, search, add to favorites, and restore the tree to its default structure.
Lesson Plan List View all lesson plans, search, open a lesson plan, remove it from the index or delete its file as well, duplicate a lesson plan, and open its location in Windows File Explorer.
Note: Removing a lesson plan from the index does not always delete the actual file. When deleting, the application asks whether you want to remove it from the list only or delete the file as well.

Categories and Curriculum Tree

Categories help you organize lesson plans according to your preferred workflow: grade level, unit, week, subject, or any other structure you choose.

  1. Open the Settings page.
  2. Choose the grade level.
  3. Select the subjects you want to include.
  4. Click Apply Curriculum Tree.
  5. The application will replace the current category tree with an organized structure based on semesters, units, weeks, and subjects.
Warning: Applying the curriculum tree replaces your current category tree, so confirm carefully if you have already created custom categories.

My Information

On the My Information page, you can enter your professional information once and reuse it in new or existing lesson plans.

  • Information is organized by language: Arabic, French, English, and Amazigh.
  • You can enter the ministry name, academy, directorate, institution, institution address, school year, teacher name, principal name, and inspector name.
  • You can select images for the logo, teacher signature, principal signature, inspector signature, and institution stamp.
  • After entering your information, click Save My Information.
When creating a new lesson plan, the application attempts to fill the appropriate fields automatically. You can also click Fill from My Information from inside the editor.

Settings

General Settings

Configure the application interface language, default lesson-plan language, number of lesson plans shown on the dashboard, access the user data folder, and enable or disable automatic filling of downloaded library lesson plans with your saved information.

Curriculum and Category Settings

Choose a grade level, select subjects, apply the curriculum tree, or restore the category tree to its default structure.

PDF Settings

Choose the PDF style, logo, PDF fonts, custom font, information header visibility, signature images, footer visibility, and whether to open the PDF automatically after exporting.

Lesson Plan Library

The Lesson Plan Library connects to the Devallone server to display ready-made folders and files. You can browse folders, refresh the list, switch between list and grid views, download a lesson plan, download and open it directly, and add items to favorites.

  1. Select a file from the library.
  2. Click Download or Download and Open.
  3. Choose where to save the file.
  4. The application saves the file using the .jodadaty format.
  5. If automatic filling is enabled, the application fills your professional information into the downloaded lesson plan.
  6. The lesson plan is added to the Recent Lesson Plans list.

Request a Book From the Library

Use this feature when you need lesson plans for a textbook that is not yet available in the library.

  1. Open the Lesson Plan Library.
  2. From the Book Request section, choose the grade level.
  3. Choose the subject.
  4. Enter only the book’s name.
  5. Click Submit Request.
  6. You can refresh My Requests to check the request status.

A request can have one of the following statuses: Pending, Accepted, Rejected, or Completed.

Warning: Do not enter personal information in the book-name field. Enter only the name of the book.

Privacy and Local Data

The default user-data location is:

%APPDATA%JodadatyWpfUserData

  • settings.json: Application settings and your information.
  • categories.json: Category tree.
  • recent_fiches.json: Recent lesson-plan index.
  • projects: Default projects folder.

When submitting a book request, the application sends Devallone a randomly generated identifier, grade level, subject, and book name. Do not include personal information in the book name.

Tips for Everyday Use

  • Complete the My Information page before creating lesson plans.
  • Set the default language and grade level from the Settings page.
  • Use Create Lesson Plan instead of manually opening a template if you want curriculum information to be filled automatically.
  • Use favorites in My Lesson Plans for quick access to frequently used categories.
  • Use Save As when you want to create another copy of the same lesson plan.
  • Before exporting to PDF, click Validate Lesson Plan.
  • Keep a backup of your UserData folder if you plan to move the application to another computer.

Common Problems and Solutions

  • My lesson plan does not appear in My Lesson Plans: Open the lesson plan and save it again so the application can add it to the index.
  • The lesson plan appears in the list, but the file does not open: The file may have been moved or deleted. Open it manually from its new location or use Open File Location if that option is available.
  • The PDF contains a watermark: This is normal if the watermark-removal feature has not been activated. It can be activated through the Microsoft Store.
  • My professional information does not appear: Make sure the information is entered under the appropriate language tab on the My Information page, then click Save.
  • The text direction is incorrect: The lesson-plan direction depends on the language selected when the lesson plan was created.
  • The Lesson Plan Library does not work: Check your internet connection because the library needs to communicate with the Devallone server.

Quick Start: Create an Arabic Lesson Plan and Export It

  1. Open the application.
  2. Go to My Information, enter your institution and teacher information, then save it.
  3. Go to Settings, select Arabic as the default lesson-plan language, and choose the grade level.
  4. Open Prepare a Lesson Plan and click Create New Lesson Plan.
  5. Enter the lesson-plan name and choose Arabic, the grade level, subject, component, domain, unit, week, session number, and duration.
  6. Choose the appropriate category from the tree.
  7. Click Create, then edit the fields and lesson stages.
  8. Click Validate Lesson Plan.
  9. Click Save or Save As.
  10. Click Export PDF and choose where to save the file.

With these steps, you have created an organized lesson plan that is saved and ready for printing.

Visit the Official Page