

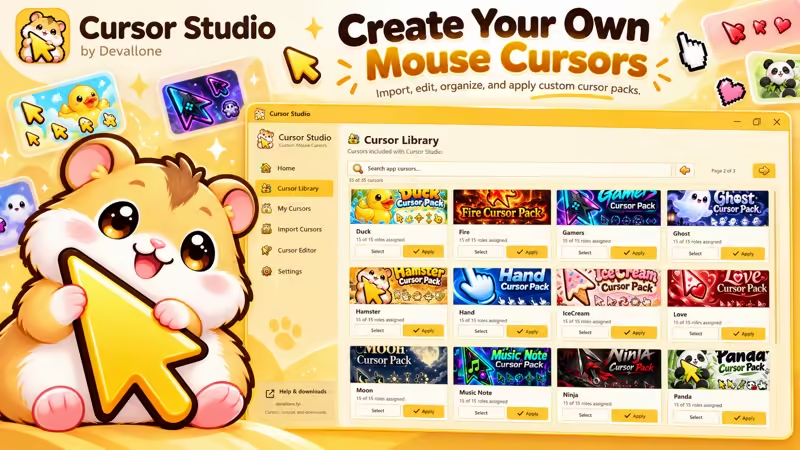
Cursor Studio – Custom Mouse Cursors. – Devallone.fyi

Cursor Studio – Custom Mouse Cursors.

Cursor Studio is a Windows app for creating, importing, editing, organizing, and applying custom mouse cursor packs. Import .cur, .ani, image files, folders, or ZIP packs, adjust hotspots, crop artwork, convert images into real cursor files, and apply complete Windows cursor themes from one friendly workspace.

App Screenshots

About This App

Cursor Studio is a custom mouse cursor manager and editor for Windows, built for users who want a simple way to create, import, customize, and apply complete cursor packs.

The app lets you work with all standard Windows cursor roles, including Normal Select, Help Select, Working in Background, Busy, Precision Select, Text Select, Handwriting, Unavailable, Vertical Resize, Horizontal Resize, Diagonal Resize, Move, Alternate Select, and Link Select.

You can import existing .cur and .ani cursor files, convert common image formats into cursor files, organize saved cursor packs, edit role assignments, adjust hotspots, and apply a complete cursor theme directly from the app.

Cursor Studio also includes a visual cursor editor with zoom, pan, crop, rotation, and hotspot controls. Instead of stretching an image into a square, you can choose the exact part of the image you want using a resizable crop square. This makes it easier to create clean, sharp cursor files from artwork, icons, or AI-generated images.

The app is designed with a warm hamster-themed interface, built-in cursor packs, multilingual support, RTL layout support for languages like Arabic, and a first-start privacy/language setup screen.

Main Features

  • Import .cur, .ani, .png, .jpg, .jpeg, .bmp, .ico, .gif, .webp, and .zip files.
  • Convert images into real Windows .cur cursor files.
  • Create complete cursor packs for all standard Windows cursor roles.
  • Edit each cursor role separately.
  • Set cursor hotspots manually or with presets.
  • Crop images using a resizable square selector.
  • Rotate and zoom images inside the editor.
  • Use mouse wheel zoom in the preview editor.
  • Pan zoomed images horizontally and vertically.
  • Save custom cursor packs locally.
  • Apply saved cursor packs to Windows.
  • Use built-in cursor packs from the cursor library.
  • Manage saved cursors with edit, apply, rename, and delete tools.
  • Choose app language on first launch.
  • Supports RTL interface layout for Arabic and other RTL languages.
  • Includes privacy policy access and official tutorial/download links.

App Details

Platform

Wondows

Availability

Microsoft Store

Updates

Supported

Use Case

Productivity

Ready to Try This Windows App?

ثبّت التطبيق من Microsoft Store وابدأ استخدامه اليوم.

Devallone Guide

Tutorial

Clean step-by-step guidance with a smoother reading experience.

Full Tutorial

  1. First Start
    When you open Cursor Studio for the first time, you will see a setup popup.

Choose your language from the dropdown, review the privacy policy if needed, then click Continue. The app saves your language choice for the next launch.

  1. Using The Cursor Library
    Open Cursor Library from the side menu.

Here you can browse cursor packs included with Cursor Studio. Use the search bar to find a pack by name. Click Select to preview a pack, or Apply to apply it directly to Windows.

  1. Importing Cursors
    Open Import Cursors.

You can import files in several ways:

  • Click Browse Files to import cursor or image files.
  • Click Import Folder to import all supported files from a folder.
  • Click Import ZIP to import a cursor pack from a ZIP archive.
  • Drag files directly from File Explorer into the import area.

Supported formats include .cur, .ani, .png, .jpg, .jpeg, .bmp, .ico, .gif, .webp, and .zip.

If you import an image, Cursor Studio converts it into a real cursor file.

  1. Choosing Export Size
    In the Image to Cursor panel, choose the cursor export size.

Common sizes:

  • 32 for normal use
  • 48 or 64 for larger cursors
  • 128 or 256 for high-resolution cursor artwork
  1. Setting The Hotspot
    The hotspot is the exact pixel Windows uses as the click point.

For normal arrow cursors, the hotspot is usually near the top-left. For centered icons or crosshair-style cursors, use Center. You can also adjust hotspots later in the Cursor Editor.

  1. Editing A Cursor Pack
    Open Cursor Editor.

Select a cursor role from the left list, such as Normal Select or Link Select. Click Import / Replace to add a cursor or image for that role.

If you import an image, use the preview editor to:

  • Zoom in or out
  • Move around the image
  • Resize the crop square
  • Rotate the crop square
  • Choose the exact part of the image to export
  • Set the hotspot by clicking the preview
  1. Saving A Cursor
    After editing your roles, click Save Cursor.

The cursor pack will appear in My Cursors. If you want to save it as a new pack, use Save As.

  1. Applying A Cursor
    Open My Cursors.

Choose a saved cursor pack and click the apply/check icon. Cursor Studio will apply the assigned roles to Windows.

If some roles are missing, only the available roles can be applied. For the best result, assign all cursor roles before applying.

  1. Managing Saved Cursors
    In My Cursors, each saved cursor pack can be:

    • Edited
    • Applied
    • Deleted
    • Renamed from the top toolbar when selected
  2. Changing Language Later
    Open Settings.

Use the language dropdown to change the app language. RTL languages such as Arabic switch the main app layout to the right side, while cursor preview/editing stays visually stable so artwork does not flip.

  1. Restoring Windows Cursors
    Open Settings.

You can restore your original cursor settings or reset Windows cursor settings to defaults using the cursor management buttons.

  1. Getting Help
    Use the Cursor Studio Page button in Settings or the Help & downloads area in the sidebar to open the official page: